从 linux pthread 转换到 std::thread
以前一直都是用pthread的API写C++的多线程程序。虽然很早之前就听说,从C++11开始,标准库里已经包含了对线程的支持,不过一直没有拿来用,最近刚好有空,借着pthread的经验学习下std::thread的用法。
1.1 Thread
std::thread的构造函数方便得出人意料,这得感谢std::bind这个神奇的函数。在std::thread的构造函数里,你可以直接传递一个函数和这个函数的参数列表给这个线程。你甚至可以传递一个类成员函数。如果你这么做了,参数列表的第二个参数(第一个参数是被传递的成员函数)会被作为该类成员函数所作用的实例。
是不是有点绕……举个例子来说吧:
// 假设buy是一个可调用的函数对象,它即可能是函数指针,也可能是函数对象

std::thread Annie(buy);

// Annie会去执行buy()

std::thread Bob(buy, book, food);

// Bob会去执行buy(book, food)

// 假设buy是Consumer的一个可调用的成员函数

Consumer Clara;

std::thread action(buy, Clara, phone);

// Clara会去执行Consumer.buy(phone)
随便提一下,当你创建了一个(非空的)线程对象时,对应线程就会执行,不需要显式的调用start或者run。
如果之前你没有用过pthread,也许不会理解何为“方便得出人意料”。
在pthread里面,你需要这样指定线程执行的函数:
pthread_create(&thread, &attr, f, static_cast<void *>(&args));
其中f是函数,args是所有参数打包成的结构体。因为pthread_create的第四个参数类型是void*,所以需要强制转型
考虑下之前那个Bob买书和饭菜的例子,如果要在pthread里面实现,首先需要定义一个结构体,然后把book和food赋值给这个结构体的成员。
接着把结构体转换成void*类型,传递进去。
这还没完呢,因为刚刚的几步只是实现了“传进去”,还得“取出来”。
之后在函数buy中,再把void*的参数重新转型成某个(可能是一次性的)结构体,最后取出book和food这两个值。
Ok!终于搞定了。随便一提,pthread_create只接受void *f(void *)这样的函数签名。如果你想调用现成的函数,你得包装一下。
这就是为什么std::thread的构造函数“方便得出人意料”。
创建线程后,调用Thread.join就会阻塞到线程执行结束为止(相当于pthread_join)。你也可以选择detach该线程,这时候线程会独立执行,不会随调用者终止而结束。
1.2 Mutex
有时候需要限制多个线程对同一资源的访问,这时候一般会使用Mutex。Mutex就是一把锁,只有某些线程可以同时占用它(通过lock操作)。当线程不用的时候,就得通过unlock操作来释放它。
对于Mutex,std::thread和pthread差不多,无非是pthread_mutex_lock(&mutex)变成了mutex.lock()等等。
不过在std::thread中,mutex往往和lock系列模板一起使用。这是因为lock系列模板包装了mutex类,提供了RAII风格的加锁解锁。
{

    std::lock_guardstd::mutex guard(mutex); // 加锁

    ...

    // 自动解锁

}
1.3 std::condition_variable
有时候线程之间需要某种同步——当某些条件不满足时,停止执行直到该条件被满足。这时候需要引入condition variable,状态变量。
在经典的生产者消费者模式下,生产者和消费者就是通过condition variable来实现同步的。当有限的生产力无法满足日益增长的消费需求时,消费者进程就会去睡一觉,直到它想要的东西生产出来才醒来。
std::condition_variable condvar;

consumer:

        std::unique_lockstd::mutex ulock(mutex);

        condvar.wait(ulock, []{ return msgQueue.size() > 0;});

producer:

        condvar.notify_all();
condition_variable需要和unique_lock搭配使用。在一个线程调用wait之前,它必须持有unique_lock锁。当wait被调用时,该锁会被释放,线程会陷入沉睡,等待着王子生产者发过来的唤醒信号。当生产者调用同一个condition_variable的notify_all方法时,所有沉睡在该变量前的消费者会被唤醒,并尝试重新获取之前释放的unique_lock,继续执行下去。(注意这里发生了锁争用,只有一个消费者能够获得锁,其他消费者得等待该消费者释放锁)。如果只想叫醒一个线程,可以用notify_one。pthread中也提供了对应的方法,分别是pthread_cond_wait,pthread_cond_broadcast,pthread_cond_signal。
wait可以接受两个参数。此时第二个参数用于判断当前是否要沉睡。
[]{ return msgQueue.size() > 0;});
相当于
while (msgQueue.size() <= 0) {

    condvar.wait()

}
嗯,还有一个问题。这里把沉睡的线程比作睡美人,万一王子变成了青蛙,来不及唤醒她,那睡美人不就得睡到天荒地老海枯石烂?
为了解决这个问题,通过wait_until和wait_for,你可以设定线程的等待时间。设置notify_all_at_thread_exit也许能帮得上忙。在pthread,对应的调用是pthread_cond_timedwait。
条件变量允许我们通过通知进而实现线程同步。可以履行发送者或接收者的角色。
作为发送者,它可以通知一个或多个接收者 因此,您可以实现发送方/接收方或生产者/消费者之类的工作流。 在这样的工作流程中,接收者正在等待发送者的通知。如果接收者收到通知,它将继续工作。
条件变量。 这就是使用条件变量所需要知道的基本所有内容,程序示例:
// conditionVariable.cpp
#include <iostream>
#include <condition_variable>
#include <mutex>
#include <thread>
std::mutex mutex_;
std::condition_variable condVar;
void doTheWork(){
std::cout << "Processing shared data." << std::endl;
}
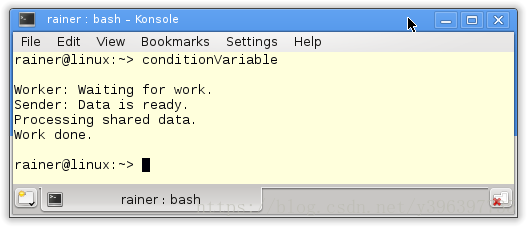
void waitingForWork(){
std::cout << "Worker: Waiting for work." << std::endl;
std::unique_lock<std::mutex> lck(mutex_);
condVar.wait(lck);
doTheWork();
std::cout << "Work done." << std::endl;
}
void setDataReady(){
std::cout << "Sender: Data is ready." << std::endl;
condVar.notify_one();
}
int main(){
std::cout << std::endl;
std::thread t1(waitingForWork);
std::thread t2(setDataReady);
t1.join();
t2.join();
std::cout << std::endl;
}
该程序有两个子线程: t1和t2。 它们在第33行和第34行中获得可调用的有效负载(函数或函子) waitingForWork和setDataReady。
函数setDataReady通过使用条件变量condVar调用condVar.notify_one()进行通知。
在持有锁的同时,线程T2正在等待其通知: condVar.wait(lck).
在等待的线程总是会执行相同的步骤:线程醒来->试图得到锁->检查是否持有锁,如果通知到达,并在获取锁失败的情况下,让自己回到睡眠状态;在获取锁成功的情况下,线程离开上面的循环过程并继续其工作。
该程序的输出也没什么意外,但是那是我的第一印象。可是接下来再看
虚假的唤醒
细节决定成败。事实上,可能发生的是,接收方在发送方发出通知之前完成了任务。 这怎么可能呢?接收方对虚假的唤醒很敏感。所以即使没有通知发生,接收方也有可能会醒来。 为了保护它,我不得不向等待方法添加一个判断。 这就是我在下一个例子中所做的:
// conditionVariableFixed.cpp

#include <iostream>
#include <condition_variable>
#include <mutex>
#include <thread>

std::mutex mutex_;
std::condition_variable condVar;

bool dataReady;

void doTheWork(){
  std::cout << "Processing shared data." << std::endl;
}

void waitingForWork(){
    std::cout << "Worker: Waiting for work." << std::endl;

    std::unique_lock<std::mutex> lck(mutex_);
    condVar.wait(lck,[]{return dataReady;});
    doTheWork();
    std::cout << "Work done." << std::endl;
}

void setDataReady(){
    std::lock_guard<std::mutex> lck(mutex_);
    dataReady=true;
    std::cout << "Sender: Data is ready."  << std::endl;
    condVar.notify_one();
}

int main(){

  std::cout << std::endl;

  std::thread t1(waitingForWork);
  std::thread t2(setDataReady);

  t1.join();
  t2.join();

  std::cout << std::endl;

}
与第一个示例的关键区别是在第11行中使用了一个布尔变量dataReady 作为附加条件。 dataReady在第28行中被设置为true。
它在函数waitingForWork中被检查:
condVar.wait(lck,[]{return dataReady;})1
这就是为什么wait方法有一个额外的重载,它接受一个判定。判定是个callable,它返回true或false。 在此示例中,callable是lambda函数。因此,条件变量检查两个条件:判定是否为真,通知是否发生。
关于dataReady dataReady是个共享变量,将会被改变。所以我不得不用锁来保护它。 因为线程T1只设置和释放锁一次,所以std::lock_guard已经够用了。但是线程t2就不行了,wait方法将持续锁定和解锁互斥体。所以我需要更强大的锁:std::unique_lock。 但这还不是全部,条件变量有很多挑战,它们必须用锁来保护,并且易受虚假唤醒的影响。 大多数用例都很容易用tasks来解决,后续再说task问题。
唤醒不了
条件变量的异常行为还是有的。大约每10次执行一次conditionVariable.cpp就会发生一些奇怪的现象:

我不知道怎么回事,这种现象完全违背了我对条件变量的直觉。 后来发现问题在于,如果发送方在接收方进入等待状态之前发送通知,则通知会丢失。C ++标准同时也将条件变量描述为同步机制,“condition_variable类是一个同步原语,可以用来同时阻塞一个线程或多个线程”。 因此,通知消息已经丢失了,但是接收方还在等啊和等啊等啊等啊… 怎么解决这个问题呢?去除掉wait第二个参数的判定可以有效帮助唤醒。实际上,在判定设置为真的情况下,接收器也能够独立于发送者的通知进而继续其工作。
1.4 More
C++11的线程库还提供了其他多线程编程的概念,比如future和atomic。
1.5 future
future包装了未来某个计算结果的期诺。当你对所获得的future调用get时,程序会一直阻塞直到future的值被计算出来。(如果future的值已经计算出来了,get调用会立刻获得返回值)而这一切都是在后台执行的。
举个例子:(future相关的内容需要#include
#include <chrono>

#include <iostream>

#include <future>

using namespace std;

int main()

{

    future<int> f1 = async(launch::async, {

        std::chrono::milliseconds dura(2000);

        std::this_thread::sleep_for(dura);

        return 0;

    });

    future<int> f2 = async(launch::async, {

        std::chrono::milliseconds dura(2000);

        std::this_thread::sleep_for(dura);

        return 1;

    });

    cout << "Results are: "

        << f1.get() << " " << f2.get() << "\n";

    return 0;

}
$ g++ -std=c++11 -pthread ./future.cpp
$ time ./a.out
Results are: 0 1
./a.out  0.00s user 0.00s system 0% cpu 2.012 total # 是两秒左右而不是四秒哦
除了async, packaged_task和promise也都返回一个future。也许接下来我可能会写一篇文章,讲讲这三者之间的差别。
1.6 atomic
atomic位于头文件atomic下,实现了类似于java.util.concurrent.atomic的功能。它提供了一组轻量级的、作用在单个变量上的原子操作,是volatile的替代品。有些时候你也可以用它来替换掉Lock(假如整个race condition中只有单个变量)
下面这个例子解释了什么叫做原子操作:
#include <atomic>

#include <iostream>

#include <thread>

using namespace std;

const int NUM = 100;

int target = 0;

atomic<int> atomicTarget(0);

template<typename T>

void atomicPlusOne(int trys)

{

    while (trys > 0) {

        atomicTarget.fetch_add(1);

        --trys;

    }

}

void plusOne(int trys)

{

    while (trys > 0) {

        ++target;

        --trys;

    }

}

int main()

{

    thread threads[NUM];

    thread atomicThreads[NUM];

    for (int i = 0; i < NUM; i++) {

        atomicThreads[i] = thread(atomicPlusOne<int>, 10000);

    }

    for (int i = 0; i < NUM; i++) {

        threads[i] = thread(plusOne, 10000);

    }

    for (int i = 0; i < NUM; i++) {

        atomicThreads[i].join();

    }

    for (int i = 0; i < NUM; i++) {

        threads[i].join();

    }

    cout << "Atomic target's value : " << atomicTarget << "\n";

    cout << "Non-atomic target's value : " << target << "\n";

    // atomicTarget的值总是固定的,而target的值每次运行时各不相同

    //

    // g++ -std=c++11 -pthread ./atom.cpp

    // Atomic target's value : 1000000

    // Non-atomic target's value : 842480

    return 0;

}
1.7 Pros and Cons
最后总结下std::thread对比于pthread的优缺点:
优点:
- 简单,易用
- 跨平台,pthread只能用在POSIX系统上(其他系统有其独立的thread实现)
- 提供了更多高级功能,比如future
- 更加C++(跟匿名函数,std::bind,RAII等C++特性更好的集成)
缺点:
- 没有RWlock。有一个类似的shared_mutex,不过它属于C++14,你的编译器很有可能不支持。
- 操作线程和Mutex等的API较少。毕竟为了跨平台,只能选取各原生实现的子集。如果你需要设置某些属性,需要通过API调用返回原生平台上的对应对象,再对返回的对象进行操作。
附上我自己写的,分别用std::thread和pthread实现的多生产者多消费者程序。注意行数上的差距。
另外,如果有想学习C语言和c++的程序员,可来我们的C语言c++学习扣qun:9416,36044免费送C语言的视频教程噢!我整理了一份适合大学生学习的c++干货,送给每一位想学的小伙伴,并且每天晚上8点还会在群内直播讲解c/c++知识,欢迎大家前来学习哦。
pthread版本
#include <pthread.h>

#include <queue>

#include <stdio.h>

#include <unistd.h>

// 注意pthread_*函数返回的异常值,为了简单(偷懒),我没有去处理它们

pthread_mutex_t mutex;

pthread_cond_t condvar;

std::queue<int> msgQueue;

struct Produce_range {

    int start;

    int end;

};

void *producer(void *args)

{

    int start = static_cast<Produce_range *>(args)->start;

    int end = static_cast<Produce_range *>(args)->end;

    for (int x = start; x < end; x++) {

        usleep(200 * 1000);

        pthread_mutex_lock(&mutex);

        msgQueue.push(x);

        pthread_mutex_unlock(&mutex);

        pthread_cond_signal(&condvar);

        printf("Produce message %d\n", x);

    }

    pthread_exit((void *)0);

    return NULL;

}

void *consumer(void *args)

{

    int demand = *static_cast<int *>(args);

    while (true) {

        pthread_mutex_lock(&mutex);

        if (msgQueue.size() <= 0) {

            pthread_cond_wait(&condvar, &mutex);

        }

        if (msgQueue.size() > 0) {

            printf("Consume message %d\n", msgQueue.front());

            msgQueue.pop();

            --demand;

        }

        pthread_mutex_unlock(&mutex);

        if (!demand) break;

    }

    pthread_exit((void *)0);

    return NULL;

}

int main()
{
    pthread_attr_t attr;

    pthread_attr_init(&attr);

    pthread_mutex_init(&mutex, NULL);

    pthread_cond_init(&condvar, NULL);

    pthread_t producer1, producer2, producer3, consumer1, consumer2;

    Produce_range range1 = {0, 10};

    pthread_create(&producer1, &attr, producer, static_cast<void *>(&range1));

    Produce_range range2 = {range1.end, range1.end + 10};

    pthread_create(&producer2, &attr, producer, static_cast<void *>(&range2));

    Produce_range range3 = {range2.end, range2.end + 10};

    pthread_create(&producer3, &attr, producer, static_cast<void *>(&range3));

    int consume_demand1 = 20;

    int consume_demand2 = 10;

    pthread_create(&consumer1, &attr, consumer,static_cast<void *>(&consume_demand1));

    pthread_create(&consumer2, &attr, consumer,static_cast<void *>(&consume_demand2));

    pthread_join(producer1, NULL);

    pthread_join(producer2, NULL);

    pthread_join(producer3, NULL);

    pthread_join(consumer1, NULL);

    pthread_join(consumer2, NULL);

}
std::thread版本
#include <chrono>

#include <condition_variable>

#include <future>

#include <mutex>

#include <queue>

// 注意某些调用可能会抛出std::system_error, 为了简单(偷懒),我没有去捕获

std::mutex mutex;

std::condition_variable condvar;

std::queue<int> msgQueue;

void producer(int start, int end)

{

    for (int x = start; x < end; x++) {

        std::this_thread::sleep_for(std::chrono::milliseconds(200));

        {

            std::lock_guardstd::mutex guard(mutex);

            msgQueue.push(x);

        }

        printf("Produce message %d\n", x);

        condvar.notify_all();

    }

}

void consumer(int demand)

{

    while (true) {

        std::unique_lockstd::mutex ulock(mutex);

        condvar.wait(ulock, []{ return msgQueue.size() > 0;});

        // wait的第二个参数使得显式的double check不再必要

        printf("Consume message %d\n", msgQueue.front());

        msgQueue.pop();

        --demand;

        if (!demand) break;

    }

}

int main()

{

    std::thread producer1(producer, 0, 10);

    std::thread producer2(producer, 10, 20);

    std::thread producer3(producer, 20, 30);

    std::thread consumer1(consumer, 20);

    std::thread consumer2(consumer, 10);

    producer1.join();

    producer2.join();

    producer3.join();

    consumer1.join();

    consumer2.join();

}
2. unique_lock的使用及参数详解
#include <iostream>
using namespace std;

#include <list>
#include <thread>
#include <mutex>
class A
{
public:
    std::unique_lock<std::mutex> rtn_unique_lock()
    {
        unique_lock<std::mutex> tmpguard(my_mutex);
        return tmpguard;
    }
    void receiveMes()
    {
        for (int i = 0; i < 10000; ++i)
        {
            //std::lock_guard<std::mutex> sbguard(my_mutex, std::adopt_lock);
            //std::unique_lock<std::mutex> sbguard(my_mutex, std::adopt_lock);
            //上述两种方法相似,默认在尾部析构函数中释放mutex
            std::unique_lock<std::mutex> sbguard (my_mutex, std::try_to_lock);
            //尝试去锁定mutex,不会卡在这里不动
            //std::unique_lock<std::mutex> sbguard(my_mutex, std::defer_lock);
            //defer_lock是初始化一个没有加锁的mutex,其中的几个关键成员函数: lock(), unlock(), try_lock(),release();
            //lock() 加锁
            //unlock() 释放锁
            //try_lock() 尝试加锁,如果成功则返回true,否则false
            //release() 返回它所管理的mutex对象指针,释放所有权,也就是 说这个unique_lock和mutex没有关系  mutex *Pmutex = sbguard.release()
            //锁住的代码的多少称为粒度
            //sbguard 和 mutex之间的关系只能是一对一的关系,需要使用move函数,转移所有权
            //std::unique_lock<std::mutex> sbguard1 (std::move(sbguard));
            //或者:见上面的rtn_unique_lock()函数,返回一个局部变量会导致系统生成一个临时unique_lock对象,并调用unique_lock的移动构造函数

            if (sbguard.owns_lock())
            {
                msgQueue.push_back(i);
                cout << "msgQueue insert " << i << endl;
            }
            else
            {
                cout << "do some other thing" << endl;
            }

        }
    }

    void dealMsg()
    {
        for (int i = 0; i < 10000; ++i)
        {
            my_mutex.lock();
            std::chrono::milliseconds dura(20000);
            this_thread::sleep_for(dura);
            if (!msgQueue.empty())
            {
                int command = msgQueue.front();
                cout << "deal msgQueue" << command << endl;
                msgQueue.pop_front();
            }
            my_mutex.unlock();
        }
    }


private:
    list<int> msgQueue;
    mutex my_mutex; //互斥量
};

int main()
{
    A myobj;
    thread threadReceive(&A::receiveMes, &myobj); //传入的对象要进行数据处理,所以传入引用。
    thread threadDeal(&A::dealMsg, &myobj);


    threadReceive.join();
    threadDeal.join();
    return 0;
}
3. 小试牛刀:
/*************************************************************************
	> File Name: test.cpp
	> Author: Veitch
	> Mail: Veitch@163.com
	> Created Time: 2019年09月04日 星期三 10时18分30秒
 ************************************************************************/

#include<iostream>
#include<stdio.h>
#include <mutex>
#include <thread>
#include <atomic>
#include <unistd.h>
#include <condition_variable>
#include <stdbool.h>

using namespace std;

class MyThread{
public:
	MyThread(void(*task)(void)):m_task(task)
	{
         std::unique_lock<std::mutex> ulock(Mtx, std::defer_lock);
         m_ulock = std::move(ulock);

		 std::thread t(&MyThread::routine,this);
         t.detach();
	}
	~MyThread(){};

	void routine()
	{
		 while(1)
		 {
				 m_task();
				 std::this_thread::sleep_for (std::chrono::milliseconds(500));
				 isRuning = false;
                 if(m_ulock.owns_lock())//unlokc前必须判断是否拥有锁
                 {
                       m_ulock.unlock(); //直接调用的话,如果没有锁,则会挂掉,因此需要判断
                          printf("unlock\n");
                 }
				 printf("Mythread wait\n");
				 condvar.wait(m_ulock,[&]{ return IsRuning();});//这里不能直接使用return isRuning,否则会报use delete function的错误,因为成员isRuning是atomic<bool>型,这个atomic的拷贝构造函数已经被删除了,因此要使用的必须使用member.load()方式,即 通过IsRuning()去获取/get
		 }
	}
	bool IsRuning(){ return isRuning;}
	void Continue(){ isRuning = true;
       				condvar.notify_all(); printf("Mythread notify\n");}


private:
	std::atomic<bool> isRuning{true};
	void (*m_task)(void);
	std::condition_variable condvar;
	std::mutex Mtx;
	std::unique_lock<std::mutex> m_ulock;//std::unique_lock<std::mutex> m_ulock(Mtx)如果这样初始化会报错:“Mtx is not a type”,不能定义的时候直接初始化
};


void MyPrint()
{
    printf("SFWERRWERWE\n");
}


int main()
{
    std::thread t([](){
      char input;
      while(1)
      {
          //   cin>>input;
          static MyThread mt(MyPrint);
          if(!mt.IsRuning())
          {
            mt.Continue();
          }
      }
    });

    pause();
    return 0;


}